Problem: My new classroom has a lot of big, bare walls and NOT a lot of storage space. I’ve solved some of that problem by procuring a collection of bookcases (three already in the classroom, one from a friend who sadly moved to France, and one from the local Steve & Kate’s Camp supply sell-off), but I’m still short on folder-sized storage space.
Previous Solution: Last year, I had an abundance of milk crates which easily stored folders. Unfortunately, I didn’t bring them with me to my new school, and even if I had them none of my bookcases are big enough to fit milk crates.
New Solution: Reduce the need for paper storage (scanning documents I am keeping “just in case” and recycle the rest), drag in a 2-drawer file cabinet from the surplus pile and make “folder holders” for the wall. These “folder holders” will be used to store the files students need to have access to. I have 5 class periods, so I chose to make 5-pocket hanger.
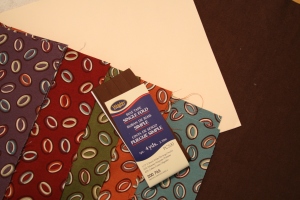 Supplies: 6 fat quarters (you will use a full fat quarter for the background, and 1/2 of a fat quarter per pocket), 2 yards of bias tape, thread.
I used a fat quarter pack and thread from my personal stash and purchased a fabric remnant (the brown background), and a packet of bias tape from JoAnn’s. Using the educator’s discount (15% off) and a 40%-off-one-item coupon, I spent less than $5 out of pocket for this.
Procedure: 1) Start by cutting the pocket panel fat quarters in half the short way to create two 11×18″ pieces of fabric; keep one of each and set the rest aside for another project (note: if you use the same color for each pocket or pair of pockets, you just need 3 fat quarters – you could fit six pockets on one fat-quarter background if you wanted). Leave the background piece alone.
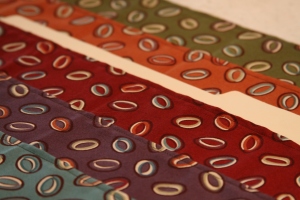 2) Sew a 1/4″ folded hem on one side of each pocket panel fat quarter, then lay them out in the order you prefer with the folded hem up. Also decide how far apart you want the folders – I originally thought I wanted 2″, but then changed to 2.5″ between the pockets in the end. Use a folder or two to help you visualize things. My goal was to make sure that more than just the folder tab stuck up above the pocket, with some fabric left to show around it.
3) Figure out where to fold the fabric to create the right depth pocket for your folders based on your preference. I needed to fold up about 1.5″. Either fold and iron in a crease on each pocket panel or use a fabric marking pencil to mark the fold line on the wrong side of the fabric. Then figure out where the pockets need to be sewn onto the backing fabric and mark that as well. You want to leave around 1″ of backing fabric at the bottom and at least 6″ at the top.
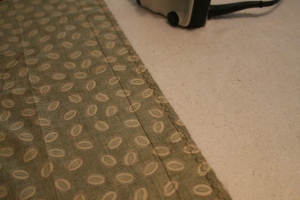 4) Start sewing the pocket panels to the backing fabric, top pocket down. To attach a pocket panel, place the fabrics right sides together with the top of the pocket panel near the bottom of the backing fabric. (Because I was using a remnant for my backing, I had to piece it together to get the right size. I chose to piece it at the end of the project to avoid extra fabric bulk – if I had been using a true fat quarter, you would see more backing fabric in the right of this photo.) Sew a straight line along the fold line marked in step #3 for each pocket panel, making sure to line the pockets up on the lines you marked on the backing fabric. Then, sew with a sturdy stitch such as a zigzag to attach the “flap” to the backing (this prevents folders from catching on the excess fabric and gives extra support).
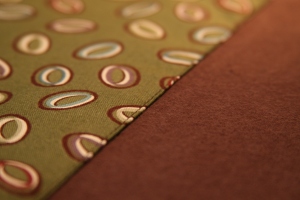 5) Fold the pocket fabric panels up and iron down, then topstitch over the very bottom of each pocket to give a crisp finish and extra support. Keep the fabric panels smooth and flat and use a rotary cutter and mat or scissors to trim the edges, then sew a basting stitch down each side of the holder to hold things in place. I trimmed each edge by about 1″ to give a finished width of about 16″, which will be big enough to accommodate legal-sized file folders.
6) Put a 1/2″ folded hem in the bottom of the background fabric, and put a large foldover “pocket” in the top of the background fabric. Use a sturdy stitch such as a zigzag for the top pocket. I made my top pocket about 2″ wide to accommodate a variety of hanging methods – I am not sure what will work best on my classroom walls, as they are a weird sort of material, so I wanted to keep it flexible. I hope I can use a piece of dowel and hanging clips to put it up, but I might need to resort to thumbtacks.
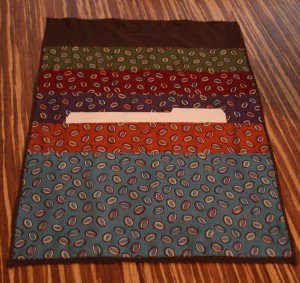 7) Cut two lengths of bias tape as long as the hanging, and sew one over each side using a sturdy zigzag stitch. Fold the ends under at each side for a nice finish. (Alternatively, you can use bias tape on all four sides of the hanger but since mine was so close in color to the background and I dislike turning corners, I opted not to do this.)
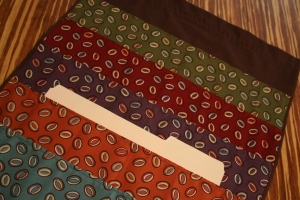
8) Put folders in and enjoy! (Shown here with a letter-sized folder, as all of my legal-sized folders are at school.)
In my tests at home today, the pockets sag just a little bit with two letter sized folders in them. I am optimistic that this won’t be necessary with five legal sized folders in it, but a couple of thumbtacks along each side will prevent it if it does occur.


That is really cool fabric! Your project turned out beautiful!!!
I love it! This will be a perfect Christmas gift for my daughter’s first grade teacher! Thanks for sharing 😊
I want to do this for sure. Thanks
Esto lo refleja bien:
Todos tenemos orígenes comunes: las madres; todos venimos de la misma sima,
pero cada uno tiende a su propio fin- Hermann Hesse 🙂 Gracias por el artículo!
In fact, I’ve been getting my tickets well below retail price.
There’s only one South Rim air tour and it does the same thing
as the 50-minute helicopter ride except at a higher elevation. Lock-down your bus tour prior to
getting to Vegas and it’s simply a case of getting a wake-up call and getting on the bus.